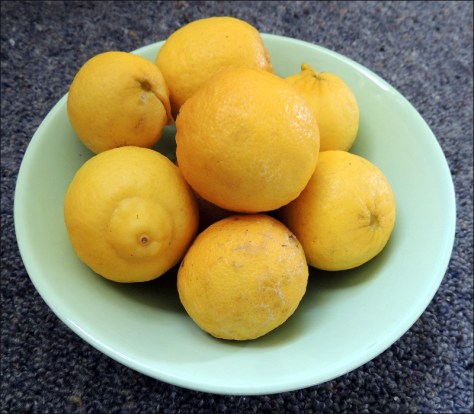
This year has been a great season for citrus, and we currently have more limes than we can eat (or drink, for that matter – thinking of the weekend looming and Margaritas on the horizon). We do grate the zest and freeze the juice in cubes for later, but it’s great to actually use these limes while they’re fresh.
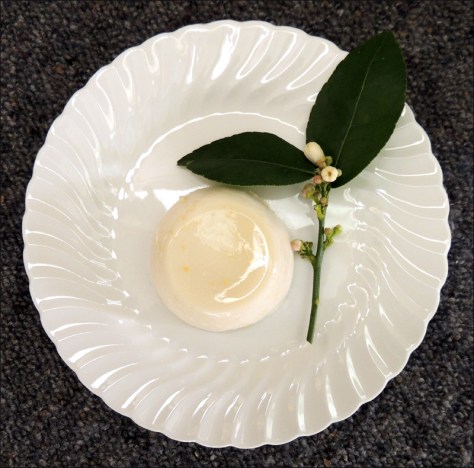
With this in mind, I sourced a Panna Cotta recipe online and have adapted it to incorporate this zingy fruit. And for those who need to know, the dessert is Vegan and Gluten-free and it’s a very acceptable 170 calories per serving. Not bad for a dessert!
3 tablespoons of genuine maple syrup (or your sweetener of choice)
2 teaspoons grated lime zest and 3 tablespoons fresh lime juice (about 1 lime’s worth)
1 bay leaf (I love the flavour of bay in a creamy dessert)
Equipment
Heavy-bottom saucepan
Rubber or silicone spatula
Measuring spoons,
Fine grater
4 small ramekins or jelly moulds (if you wish to turn the panna cottas out, grease them lightly with a plain-tasting oil, e.g., sunflower).
How to make them…
Pour the coconut cream into a saucepan and sprinkle the Jel-it-in on top. Stir until the powder is completely dissolved, then add the bay leaf, the maple syrup, and the lime (zest and juice). Gently bring to the boil, stirring occasionally. Allow it to boil for a minute or two, then remove from the heat and allow to cool a little.
Remove the bay leaf. Pour into the four ramekins and let them cool a little more, then cover and refrigerate. I tend to leave them out of the fridge until they are quite cold, so that when I cover them, they don’t steam up inside and cause condensation on the top of the desserts, but it’s no biggie, either way.
You can serve the Panna Cotta garnished with a slice of lime – very tangy! or with whatever you like, really – chopped nuts, sliced fruit, whatever is around.
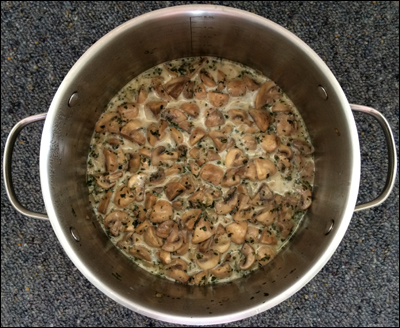
Mushrooms and coconut cream simmering until sauce is reduced to the desired thickness
Method
Using a large pan, saute the onions in 2 tbs coconut oil until golden and transparent. Meanwhile, finely chop the marjoram with the garlic.
When the onion is ready, add the herbs & garlic to the mix and cook through. Remove from the pan and set aside.
Add the remaining 4 tbsp coconut oil to the pan. When hot, throw in the white mushrooms and stir to evenly mix the coconut oil through.
Keeping the heat medium-to-high, and stirring at intervals, cook the mushrooms until their juices are starting to ooze out, then a little more to dry some of them up.
Add the herb & garlic mixture and stir through.
Reduce the juices a little, then pour in the coconut cream. Stir through.
Reduce heat to medium. Stirring regularly, simmer the mushrooms until the coconut cream has reduced to the desire thickness. This would depend on personal taste, i.e. on how much sauce you wanted to serve up with your mushrooms.
Creamy Vegan Mushrooms is ideal for brunch, or as an addition to a main meal. It’s yummy served with lightly toasted Ciabatta.
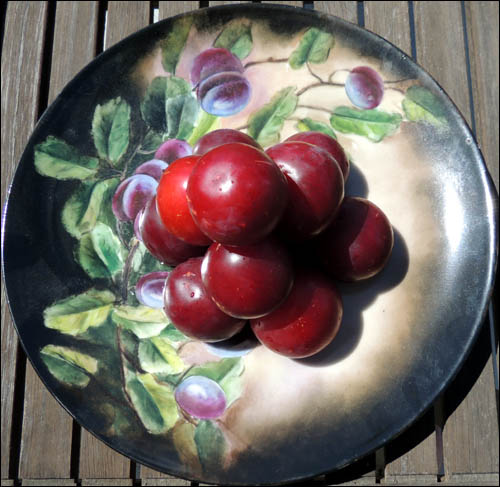
We’ve picked just about the last of our plums today.
We’ve had so many plums this season, despite the wind that destroyed so many in mid-December. I’ve been making ‘Plum Everything’, including having started a batch of plum wine. But I think there is nothing nicer than a Plum Jam, as it’s so versatile.
This year I decided to invent a spicy version – and it’s turned out extremely well.
For the spicy component I used Habanero that I’d grown last season and had frozen, as our current plant is too small to produce any fruit yet. It’s been a slow season in the garden due to the inclement weather in December.
Four of our home-grown Habanero chilies
Habanero is my absolute favourite chili pepper. It has such an amazing flavour – very fragrant and fruity, as well as the excellent kick it provides (it rates as 100,000 to 350,000 on the Scoville Scale).
This jam is not for the faint-hearted, but it’s definitely worth making. It can be added to sauces or used as a condiment just as it is, or (of course) spread on your toast as a rich and spicy jam.
Our lovely yellow-fleshed, red-skinned plums.
Ingredients
About 5.5 kilos (around 12 lbs) red-skinned plums, stones removed
3 – 4.5 cups white sugar
4 whole Habanero, seeds removed
Method
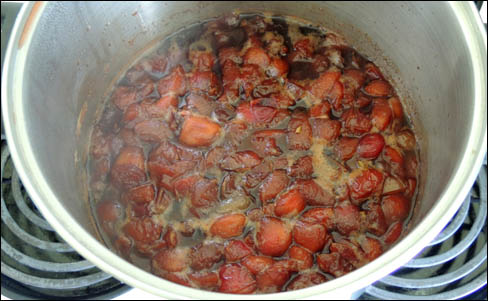
Chop the plums up roughly and put them in a large preserving pan. Sprinkle the sugar on top and let them sit like this for an hour or so, stirring from time to time to help the sugar dissolve.
Second boiling of the sauce.
Bring this slowly to the boil, stirring at frequent intervals to prevent anything sticking to the base of the pan. Once boiling steadily, maintain the boil for about 10 minutes then turn off the heat and allow to cool to room temperature.
Repeat the above process 3 times (or more if you would like a thicker jam). The main thing to remember is that you have to stir frequently, especially while you are waiting for the fruit to come to the boil, to avoid the fruit sticking to the bottom of the pan and scorching.
If this does happen, don’t panic… transfer the jam to another container without scraping any of the ‘caught’ jam from the bottom of the pan. Wash the pan then carry on with the process. You can stop and start with this recipe easily.
A dollop of spicy jam.
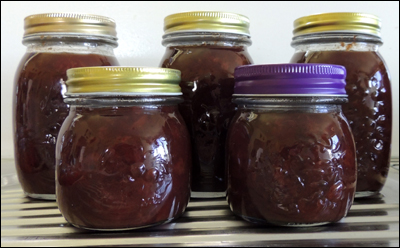
This batch produced about 3 litres of wonderfully rich jam. Actually, I could just eat it directly from the spoon, rather than add it to anything else. 🙂
Notes
Red Plums versus Yellow Plums
Some of the jars of jam. You can see the lovely dark colour it has developed.
You could use yellow-skinned plums for this recipe, or even greengages, but the red-skinned plums give the jam the most wonderfully rich colour, even using yellow-fleshed plums as I have.
Sugar
I began with 3.5 cups of sugar and then tested the flavour part way through the cooking. It was then that I decided to add an additional .5 of a cup. It’s a matter of personal taste and also, the sugar level in the plums themselves. Also, I like to cut down added sugar where I can, so I tend to start out with a bit less in a recipe such as this, and then add more if I need to.
The above recipe has been adapted from a recipe I found on the Natasha’s Kitchen site.
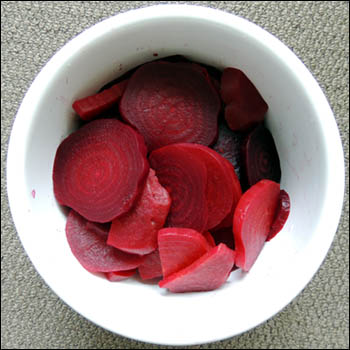
This recipe requires about 5 – 6 medium-sized beetroots.
Prepare the beetroots by washing off any soil, and trimming the stalks back close to the root. Leave the long ends of the roots in place so that the beetroots don’t lose too much colour while being cooked. Cook in water until just tender. Drain and allow to cool.
Set aside the sliced beetroot in a bowl.
Once cool, remove the skins – the easiest way is by hand, under slowly-running water. Slice the beetroots evenly and set aside in a bowl.
Pickling Liquid
Combine the following ingredients in a pan and bring to the boil.
3/4 cup white sugar
1/4 teaspoon plain salt
1 1/2 cups white vinegar
3/4 cup water
1/2 teaspoon peppercorns
1 bay leaf
2 cloves
1/2 teaspoon yellow mustard seeds
1/2 cinnamon stick
The pickling liquid simmering on the stove.
Simmer for five minutes then strain through a sieve or muslin. Bring back to simmer heat.
Pack the beetroot into hot, sterilised jars and pour in the pickling liquid until the beetroot is covered. Seal.
Pickled beetroot can be kept for some months stored in a cool place, but once opened should be kept in the refrigerator. If finished using the water bath method, it will last longer.
Last Wednesday was a very warm day at South Head, becoming unbearably hot as the day progressed. After work at 1.00 pm I went outside to check on the state of the garden but didn’t last in the heat for long. I had taken some fresh water and a cup of pullet food to the new Orpingtons and then made my usual rounds.
Overgrown zucchinis, hiding in the vege patch
It clearly doesn’t pay to leave zucchinis unchecked for more than a couple of days as I found some monsters vying for space under one of the plants. When I brought them inside I discovered that the two largest weighed 1600 and 1200 grams respectively.
Sauteed zucchini with fresh ricotta
I am definitely getting to the stage of being ‘over’ zucchinis! We have pickled, grated, fried, sauteed and stuffed them. We’ve covered them in garlic, crispy sage, tomatoes, mushrooms, vinegars and spices. I’m getting fussy now and am loath to use them once they’ve grown too fat.
Zucchini Pickle
However, having said this, I did come across a really good zucchini pickle recipe which required 1 kg of diced zucchini. I made a batch on Sunday, as I also had some more gherkins to pickle. The other ingredients are chopped onions, turmeric, white vinegar, sugar, water and celery seeds and the result was a particularly yummy, sweet pickle, not unlike a sweet gherkin pickle, but (dare I say it) better.
I’ll definitely make this again and will type up the recipe at some point.
Freshly-picked peas
It’s great that our peas are have been coming along nicely, despite the paucity of rain. We’ve had two meals from them so far this week, and (of course) have eaten quite a few straight from the vine. That’s the only trouble with peas – having to resist the temptation to eat them straight from the plant – if you want to have enough left for a meal.
I’m glad now that I sowed another row a couple of weeks back.
Sparrow Zone
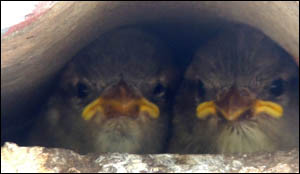
Sparrow Riviera in late Winter
Talking of surpluses, we had named the long edge of the garage roof closest to the house ‘Sparrow Riviera’ as there are always so many sparrow families nesting there. From just before dawn until well beyond dusk, the sound of sparrows going about their daily life is a constant. They seem to be continually building new nests and raising new batches of babies.
Baby sparrows peeping out from under the roof
The young ones are learning to fly at the moment and have amused us with their antics. We know that if we see a fledgling flying towards us, we need to move aside or duck, as they haven’t quite honed up their skills sufficiently to avoid an unexpected obstacle. They fly into windows and fall to the grass, temporarily stunned, or chirp plaintively from the roof, hoping a parent will come by and feed them.
Molly snoozing in the living room
If Molly has caught any of these new flyers, she must have devoured them completely as we haven’t seen any partially-eaten bodies.
Beetles and Moths
I’m always on the look-out for new bugs to identify.
Burnt pine longhorn beetle
Last Tuesday evening, when I went to take note of the solar power readings (I keep them on a spread-sheet) there was a Burnt Pine Longhorn Beetle (Arhopalus ferus) sitting on our back porch.
Left to right: Apple Looper moth; Cabbage Tree moth
I’ve also managed to photograph a couple of different moths – the tiny (15 mm wing-span) Apple Looper Moth(Phrissogonus laticostatus) and the endemic Cabbage Tree moth (Epiphryne verriculata)
Coffee Soap
For some time I’ve been meaning to mix up a new batch of soap. In particular, some soap suitable for our vegans. I finally found the time to doing this on Sunday.
I had already decided to try a Coffee Soap recipe that I’d come across thanks to being on David Fisher’s Candle and Soap-making mailing list. It seemed like this would be a nice change from the usual scented soaps I’ve experimented with, and I’d also read that coffee-scented soap was useful for cooks, as it helped remove the odours of garlic and fish.
Soap isn’t that difficult to make and and can either be made traditionally, using different fats (i.e. beef or mutton), or by using vegetable oils. The only ingredient you need to take care with when making soap, is lye, as this can be a very volatile and dangerous item to work with. Special attention must be paid when adding the lye to the water, and one should always don protective glasses and gloves, and work in an area with good air circulation. Lye is critical for soap making and soap cannot be made without it. It reacts with the oils to form soap and glycerin.
Left to right: Spicy Mandarin soap; Lemon Grass/Kaffir Lime soap
Soaps I’ve made in the past are rosemary, cranberry/oatmeal, lavender, spicy mandarin and lemon grass/kaffir lime. One batch makes quite a few individual soaps so I tend not to make soap too often.
Home-made soap has no preservatives and supposedly doesn’t last as long as commercial soaps, but some of our soaps are around 2-years old and still haven’t deteriorated noticeably. I keep them in a dark drawer.
Basic Soap-Making Process
The soap-making process involves the careful measuring of the proportions of all the ingredients. My basic vegan soap recipe includes water, canola oil, caster oil, olive oil, coconut oil and lye. There are very good calculators online that help you work out the exact proportion of lye to use, based on the fats/oils in your recipe.
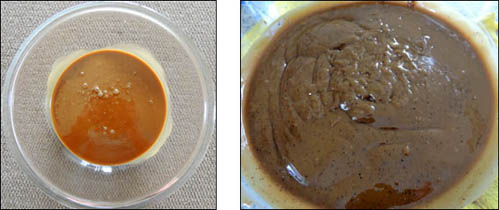
Left to Right: Strong fresh coffee; Lye and coffee solution; Melted oils
The powdered lye is added carefully to the cold water (in this case to the coffee). Adding lye to water causes a chemical reaction that generates a great deal of heat, so this has to then cool down. Care must be taken not to inhale any fumes, too, and to avoid being burnt by the lye or the lye/water mixture.
While the lye/water mixture is cooling down, the oils are brought to within the 10 degrees of the same heat – you are aiming for between 90 and 110 F for both mixtures. Once they have reached this range, the lye/water mixture can be carefully stirred into the oils.
Left to Right: Coffee/Lye solution added to the oils; Mixture at trace consistency
The next step involves using a stick blender to stir the mixture until it reaches a thin pudding or gravy-like consistency (known as having ‘traced’). When it’s ready, the drippings will leave a pattern on the surface if you lift the blender out of the mixture. You could also use a whisk or a regular egg-beater, but thank goodness for technology as this would take ages!
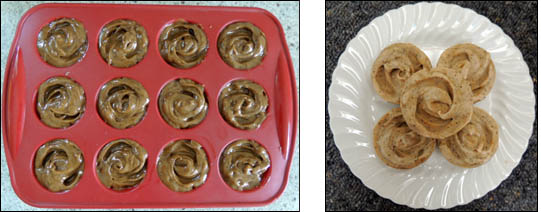
Left to right: Soap poured into muffin tray; Finished soaps
I’ve been using a muffin tray as a soap mould as it’s easy to pop them out once they have set. Soaps made using this method have to be left for two days, after which they should be ready for turning out of their moulds or cutting into blocks, etc. The finished product should then be left to ‘cure’ for 3-4 weeks before use.
Hen Update
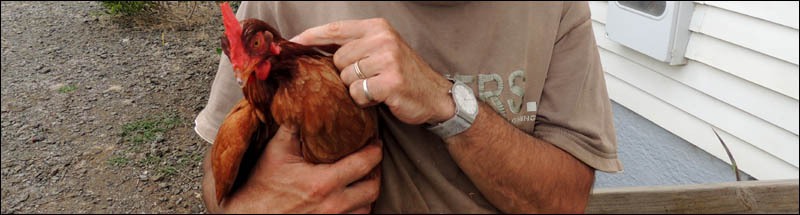
The four new pullets have settled in well. We are thinking of opening the ‘door’ between the two parts of the run in about a week’s time.
Our red shavers are as mischievous as ever. They will slip inside the back door if we leave it open, making straight for Molly’s cat-food or milk. Once caught, they will meekly let us carry them back outside. Lottie and Lulu are the most common culprits.
Actually, it can be very annoying. Imagine a hot day with all the doors and windows open – I’ll be working away at some project and will hear the ‘tap, tap, tap’ of beak on plate, and will have to stop what I’m doing to chase the little biddy out.
It’s radiantly sunny again today, but we did have a couple of hours of rain for part of Sunday. It fell heavily which was a welcome boost to our water tank, as well as providing much needed moisture to the various gardens.
Left to Right: Plum Chutney, Corn Relish (Southern), Beetroot Chutney, Cilantro Corn Relish, Plum Sauce, Pickled Gherkins, Pickled Zucchini
I was very busy preserving more surplus food over the weekend, including beetroot, zucchini, corn, cucumber and gherkins.
For the beetroots I tried out a Nigella Lawson recipe for Beetroot Chutney. The resulting chutney set very well due to having apples included in the recipe. It is very sweet and spicy and was pretty yummy straight from the pan, but will also improve with age.
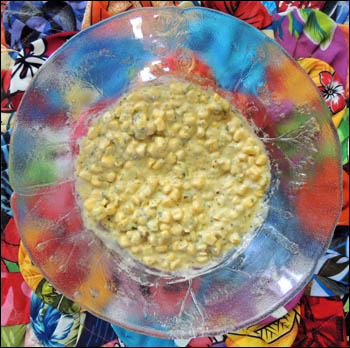
I also experimented with a new Corn Relish recipe from a Southern Foods website. This recipe included tomatoes, green pepper and cucumber, as well as the corn, but I ended up adding a wheat flour paste (1/2 cup flour / 1/2 cup water) to thicken it.
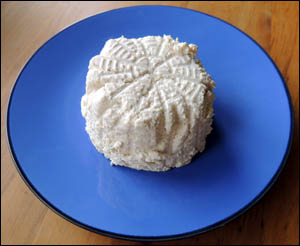
Ricotta Salata, day 2 of salting process.
On Sunday I made a batch of ricotta cheese, which I have pressed into a mould and am now resting on a rack in the fridge for a week, lightly salting the outside each day, with the aim of turning it into a cow’s milk version of a Ricotta Salata. After the salting period, the cheese will need to be aged further in the refrigerator (for approximately 2 – 4 weeks).
Freshly-made soy ricotta.
This set me thinking about the vegans in our family and whether I could do the same with a litre of soy milk. So using the same method, I made a batch of soy ricotta last night.
It actually turned out very well, considering that it was an experiment. The soy milk I used was Soy Milky as this is our favourite drinking soy milk, but I think that the added sugars and flavours have had an impact on the flavour of the soy cheese.
1/2 cup dried soy beans soaking in 2 cups water.
So, today, I’m soaking some soy beans to see if I can make some soy milk from scratch, and then use this to make the soy ricotta.
It would be great if I could go on to convert this to a soy version of the ‘Ricotta Salata’, as a harder cheese is so much more versatile. The soy cheeses available from specialty vegan shops are very expensive so I’d love to make an edible version of my own.
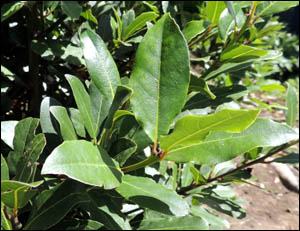
Bay tree in our garden.
I suspect that the addition of a bay leaf to the milk during the heating process would provide an interesting dimension to the flavour – especially as bay leaves can enhance both savoury and sweet recipes. Our two bay trees (Laurus nobilis) are very valuable members of our home garden.
Two juvenile turkeys sneaking through our property.
Finally, when I was working this morning I kept hearing an unusual chirping sound – when I went into the living room to see if I could identify which bird was making this sound, I saw two young turkeys walking across our front lawn in the direction of the pumpkin patch. I only just manage to take a photo before they disappeared out of sight.
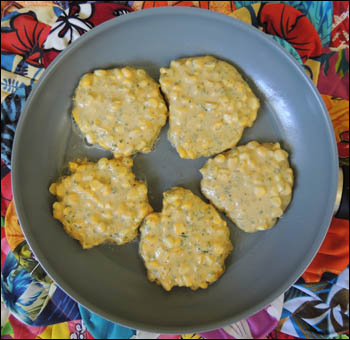
To 1 cup of fresh corn kernels, add 1 tsp finely chopped oregano (or marjoram) and one fresh farm egg. Mix these together with a fork.
corn, egg & oregano
Then add the flour, baking powder, salt, pepper and cumin and stir these in with the fork.
Add dry ingredients
To this mixture add enough soy milk to make a smooth batter. This recipe is light on batter and heavy on corn, so don’t make the mixture too runny.
Add soy milk to make a batter
Heat a pan to medium to hot heat, and add a small amount of sunflower oil and butter – just enough to prevent the fritters from sticking. Add mixture in approximately 1/4 cup portions – this will make 5 small fritters.
Fritters cooking in the pan
Turn fritters when they have browned on one side and serve when cooked through and nicely browned on the other side.
Notes
Using equal amounts of both oil and butter allows the pan to heat without the butter burning, yet retains the flavour butter provides.
The backdrop to the photos on this page is a colourful hand-sewn fabric rug from Nalauwaki village, Fiji Islands.
Wash and chop plums coarsely. Peel and chop onions.
Add both the plums and the onions to a large cooking pan, along with the 1/4 cup of water. Cook gently until soft.
Tie the cloves, allspice, peppercorns, cinnamon stick, root ginger and mustard seeds in a muslin bag using a length of string. Place the spice bag in the pan so that it is submerged in the plum/onion mixture and tie the end to the handle for easy removal. Add the brown sugar, salt and malt vinegar.
Cook uncovered, until mushy, then push through a colander or sieve.
Return the sieved pulp to a saucepan and simmer until it has reached the thickness of sauce required.
Bottle using your usual method in hot sterilised jars. Seal and store.
Additional Notes
The easiest way to remove the skin from root ginger is by scraping gently with the curved edge of a small spoon.
This time round I used around 2/3 red-fleshed and 1/3 yellow-fleshed plums. Both had dark red skins.
I used the water bath method, heating the filled jars at 90C for 20 minutes.
This recipe makes around 600 – 800 mls, depending on how thorough you are with pushing the pulp through the sieve.
The sauce itself lasts a year and possibly longer. We tend to use it all before more than a year has elapsed.
As it ages it takes on a very rich dark colour, with a notable improvement in flavour.
Thinly slice the zucchinis using a sharp knife or a mandolin. Place these in a bowl with the finely-chopped onion and sprinkle with the salt. Cover with ice-cold water, stir to dissolve the salt, and leave for 1 hour. Drain the zucchini well and pat dry using a clean tea towel.
While the zucchini are soaking, add the vinegar, sugar, mustard powder, mustard seeds, celery seeds, habanero and ground turmeric to a preserving pan and bring to a simmer. Allow to bubble for 3 minutes, stirring to ensure the sugar is dissolved, then allow to cool until just warm. Add the zucchinis and stir.
Add the pickle to sterilised jars. I then used the water bath method to finish off this recipe.
Notes
This will make approximately 1 litre of the pickle. For this recipe I used the zucchini, Costasta Romanesco as it’s the only zucchini I grow these days. Not only does it produce the huge male flowers useful for stuffing and deep frying, but the texture and flavour of the flesh is far superior to that of regular zucchini.
Adapted from the ‘Crunchy Courgette Pickle’ recipe, posted on the BBC Good Food website.
Combine plums, onions, raisins, sultanas, garlic, brown sugar, salt, mixed spice and habanero in a preserving pan. Add enough malt vinegar to almost cover and stir well.
Bring to the boil and simmer gently with frequent stirring for 2 hours, or until the chutney as thickened to a jam-like consistency.
(I was too lazy to remove the skins before cooking, so I picked them out once they were floating on top.)
Pack into sterilised jars and seal while hot.
Notes
This will make enough for 6 x 350 ml jars.
Unopened, this chutney will keep for up to 1 year. Once opened, store in the fridge.
Adapted from the recipe for Fruit Chutney, published in ‘Edmonds Chutneys, Pestos, Jams & Other preserves, (2000), p. 12.