Tag Archives: New Zealand

Garden Critters and Hidey-Holes

The 'hidey-hole', looking in.
The ‘hidey-hole’, looking in.

Forest Semilooper

Forest Semilooper (Declana floccosa)

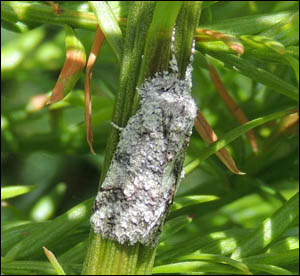
I spotted this charming little moth (above) when I was trimming the ‘hidey-hole’ this afternoon.  I wasn’t able to identify it, so posted it on NZ’s NatureWatch website, where it was ID’d.  It wasn’t until I looked at the photo that I realised how pretty it is.  It looks to me like it is garbed in a crocheted cloak, woven in shades of silver grey.

The Forest Semilooper is a moth of the Geometridae family, and native to New Zealand.

Hidey-Hole

Left to Right: View heading towards the hidey-hole; looking inside; view from other side.
Left to Right: Looking inside the hidey-hole; view from above; view from the other side.

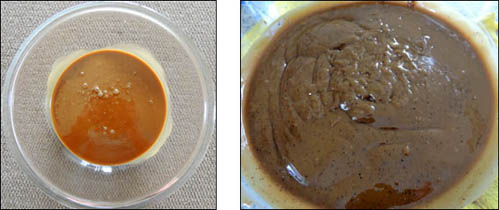
Regarding the ‘hidey-hole’ – this is being created from the fresh stump of a redwood.  When we moved here, the tree itself was in poor shape, having been smothered in nasty ivy for several years – it had a great deal of die-back and the limbs were distorted and many, while still alive, lacked any needles.  It was also blocking the Eastern sun from our solar panels. 🙂

We arranged to have it cut down a couple of months back, but when it started to sprout new growth from the base, I decided to fashion it into a hidey-hole for any little visitors (of the human kind) that we may have.

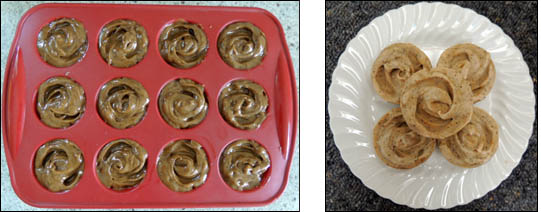
On the topic of ‘redwoods and regeneration’, I read on the internet that due to the fact that seed germination is very low, most redwoods grow more successfully from sprouts that form around the base of a tree, utilising the nutrients and root system of a mature tree.  When the parent tree dies, a new generation of trees rise, creating a circle of trees that are often called fairy rings.

This amused me as this is exactly what I thought of when I saw the new growth around the sawn-off stump.

Scar Back Gem (Ctenoplusia limbirena)

Scar Back Gem moth
Scar Back Gem moth

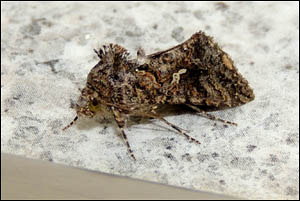
This exotic noctuid moth originally hails from Europe and was first sighted in New Zealand in 2011 (Auckland).  It was not considered enough of a pest to warrant special attention and has been removed from the Unwanted Organism Register.  We have found a couple indoors in the past couple of days.  They are pretty cute with the frilly tufts on the top of the thorax.

Green Vegetable Bug

Green Vegetable Bug on Calendula spp. seed-head
Green Vegetable Bug on Calendula seed-head

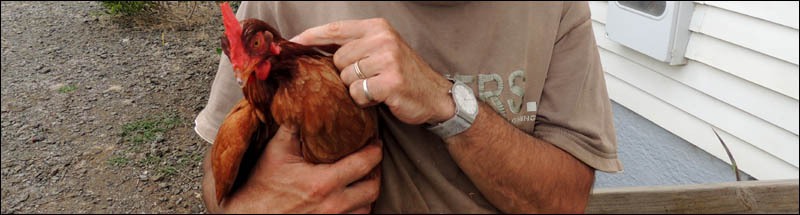
Green vegetable bugs (Nezara viridula) are back in the garden again.  This one is sitting on the seed head of a marigold (Calendula Officinalis ‘Indian Prince’).  Our first three hens (who have sadly left us for the free range in the sky) loved to eat these bugs and I used to collect them from around the garden for them.  But current three red shavers don’t seem to recognise them as a food item, and I think the Orpingtons are still too young to be given these to try.

Asian Paper Wasp

Asian Paper Wasps on jade plant
Asian Paper Wasps on a Jade Plant (Crassula ovata)
This is the third Asian Paper Wasp nest we have found this season.  According to the Department of Conservation, they are tolerant of human activity unless their nest is physically disturbed, and feed mostly on caterpillars.  There is also anecdotal evidence that they decimate monarch caterpillars and may therefore do likewise to native butterflies and moths.
As far as ‘unwelcome visitors’ are concerned, the Asian Paper Wasp is the most recent, having been first found in New Zealand (Auckland, again) in 1979.  Attempts to eradicate it failed as it was too well-established and it has since been found throughout the North Island and at the top of the South Island. 
The nests of paper wasps (both Asian and Australian Paper varieties) can be found hanging from small shrubs and trees, fences and walls, and under the eaves of buildings.
Monarch Butterfly Caterpillar
Caterpillar of the Monarch Butterfly, on a Swan Plant
The comments about monarch butterfly caterpillars interested me, as we have many on our swan plants at the moment.  The plants have self-sown incredibly successfully and are growing all over the property – in my flower beds, in the dry gravel of the drive-way, in the vegetable garden, cottage gardens, etc. 
The first year we had only 6 baby plants and they were almost completely eaten up by caterpillars, but I don’t think we’ll have that problem again.

Sparrows and Kawakawa Tea

Sparrows eating corn

I think that sparrows are the rabbits of the sky.

On the branch so high,
A grey sparrow and her mate
Flutter, joined as one.

Mating house sparrows are everywhere, this summer.

Chattering in twos and threes on the guttering of the house, romping on the grass, sipping tepid water from the bird bath, dusting themselves in small leafy hollows under the feijoa trees, dangling (joined) from slim, twiggy branches, coupling in flight (just about!).

At around 6.30 am, the tui announces the imminent dawn.  This wakes up the sparrows, which then start up a loud chirruping and whistling chorus in surround-sound.  The only direction the sound doesn’t seem to come from is under the house.

Do we have a sparrow problem?  Perhaps, but I can’t be cross with these small grey bundles of feathers, as they are so endearing.

Sparrows eating corn

The sparrows are almost as well-trained as our hens.  They fly in from all directions when the hens are called for wheat or a cob of corn, and they’ll fly down to the pellet feeder when one of the hens puts her foot on it to open the lid.  Sometimes they fly out from the feeder when we’ve opened the lid to check on food levels.   And we once found a dead sparrow in the feeder – a young one.

They also help out with keeping control of the caterpillars and grubs.  A green caterpillar wriggling in a sparrow’s beak is a common sight – the avian equivalent of a pizza delivery.  Fast food, but not fast enough!

Male house sparrow
Male house sparrow

House Sparrows were liberated in New Zealand in the 1860s and soon inhabited most localities apart from forests and mountain ranges.  Moon, Lynette, Know Your New Zealand… Birds (2006), New Holland Publishers (NZ) Ltd.

Kawakawa Tea

Kawakawa  growing in our garden
Kawakawa growing in our garden

I decided to try kawakawa tea this afternoon.  I picked a handful of kawakawa (Macropiper excelsum) leaves and simmered them for 10 minutes in enough water to make two cups.

The holes in the leaves are made by the caterpillar of the kawakawa looper moth (Cleora scriptaria) and interestingly, the leaves with holes are especially suitable for tea as they have the most concentrated medicinal properties.

Left to right: kawakawa leaves, kawakawa tea

The resulting tea was surprisingly enjoyable.  I’m not really a herbal tea person, but the flavour was very refreshing and hard to define.  The aroma of the hot tea was especially tempting, too.

Project for the future:  Make a batch of soap using strong kawakawa tea.

Surpluses, Beetles, Moths and Soap

Zucchini Surplus

Last Wednesday was a very warm day at South Head, becoming unbearably hot as the day progressed.  After work at 1.00 pm I went outside to check on the state of the garden but didn’t last in the heat for long.  I had taken some fresh water and a cup of pullet food to the new Orpingtons and then made my usual rounds.

Overgrown zucchinis, hiding in the vege patch

It clearly doesn’t pay to leave zucchinis unchecked for more than a couple of days as I found some monsters vying for space under one of the plants.  When I brought them inside I discovered that the two largest weighed 1600 and 1200 grams respectively.

Sauteed zucchini with fresh ricotta

I am definitely getting to the stage of being ‘over’ zucchinis!  We have pickled, grated, fried, sauteed and stuffed them.  We’ve covered them in garlic, crispy sage, tomatoes, mushrooms, vinegars and spices.  I’m getting fussy now and am loath to use them once they’ve grown too fat.

Zucchini Pickle
Zucchini Pickle

However, having said this, I did come across a really good zucchini pickle recipe  which required 1 kg of diced zucchini.  I made a batch on Sunday, as I also had some more gherkins to pickle.  The other ingredients are chopped onions, turmeric, white vinegar, sugar, water and celery seeds and the result was a particularly yummy, sweet pickle, not unlike a sweet gherkin pickle, but (dare I say it) better.

I’ll definitely make this again and will type up the recipe at some point.

Freshly-picked peas
Freshly-picked peas

It’s great that our peas are have been coming along nicely, despite the paucity of rain.  We’ve had two meals from them so far this week, and (of course) have eaten quite a few straight from the vine.  That’s the only trouble with peas – having to resist the temptation to eat them straight from the plant – if you want to have enough left for a meal.

I’m glad now that I sowed another row a couple of weeks back.

Sparrow Zone

Sparrow Riviera in late Winter

Talking of surpluses, we had named the long edge of the garage roof closest to the house ‘Sparrow Riviera’ as there are always so many sparrow families nesting there.  From just before dawn until well beyond dusk, the sound of sparrows going about their daily life is a constant.  They seem to be continually building new nests and raising new batches of babies.

Baby sparrows peeping out from under the roof

The young ones are learning to fly at the moment and have amused us with their antics.  We know that if we see a fledgling flying towards us, we need to move aside or duck, as they haven’t quite honed up their skills sufficiently to avoid an unexpected obstacle.  They fly into windows and fall to the grass, temporarily stunned, or chirp plaintively from the roof, hoping a parent will come by and feed them.

Molly snoozing in the living room

If Molly has caught any of these new flyers, she must have devoured them completely as we haven’t seen any partially-eaten bodies.

Beetles and Moths

I’m always on the look-out for new bugs to identify.

Burnt pine longhorn beetle

Last Tuesday evening, when I went to take note of the solar power readings (I keep them on a spread-sheet) there was a Burnt Pine Longhorn Beetle (Arhopalus ferus) sitting on our back porch.

Apple Looper moth and Cabbage Tree moth
Left to right: Apple Looper moth; Cabbage Tree moth

I’ve also managed to photograph a couple of different moths – the tiny (15 mm wing-span) Apple Looper Moth (Phrissogonus laticostatus) and the endemic Cabbage Tree moth (Epiphryne verriculata)

Coffee Soap

For some time I’ve been meaning to mix up a new batch of soap.  In particular, some soap suitable for our vegans.  I finally found the time to doing this on Sunday.

I had already decided to try a Coffee Soap recipe that I’d come across thanks to being on David Fisher’s Candle and Soap-making mailing list.  It seemed like this would be a nice change from the usual scented soaps I’ve experimented with, and I’d also read that coffee-scented soap was useful for cooks, as it helped remove the odours of garlic and fish.

Soap isn’t that difficult to make and and can either be made traditionally, using different fats (i.e. beef or mutton), or by using vegetable oils.  The only ingredient you need to take care with when making soap, is lye, as this can be a very volatile and dangerous item to work with.  Special attention must be paid when adding the lye to the water, and one should always don protective glasses and gloves, and work in an area with good air circulation.  Lye is critical for soap making and soap cannot be made without it.  It reacts with the oils to form soap and glycerin.

Spicy Mandarin and Lemon Grass / Kaffir Lime soaps
Left to right: Spicy Mandarin soap; Lemon Grass/Kaffir Lime soap

Soaps I’ve made in the past are rosemary, cranberry/oatmeal, lavender, spicy mandarin and lemon grass/kaffir lime.   One batch makes quite a few individual soaps so I tend not to make soap too often.

Home-made soap has no preservatives and supposedly doesn’t last as long as commercial soaps, but some of our soaps are around 2-years old and still haven’t deteriorated noticeably.  I keep them in a dark drawer.

Basic Soap-Making Process

The soap-making process involves the careful measuring of the proportions of all the ingredients.  My basic vegan soap recipe includes water, canola oil, caster oil, olive oil, coconut oil and lye.  There are very good calculators online that help you work out the exact proportion of lye to use, based on the fats/oils in your recipe.

Coffee Mixture, Lye & Coffee, Melted Oils
Left to Right: Strong fresh coffee; Lye and coffee solution; Melted oils

The powdered lye is added carefully to the cold water (in this case to the coffee).   Adding lye to water causes a chemical reaction that generates a great deal of heat, so this has to then cool down.   Care must be taken not to inhale any fumes, too, and to avoid being burnt by the lye or the lye/water mixture.

While the lye/water mixture is cooling down, the oils are brought to within the 10 degrees of the same heat – you are aiming for between 90 and 110 F for both mixtures.  Once they have reached this range, the lye/water mixture can be carefully stirred into the oils.

Left to Right: Ready soap, finished soap
Left to Right: Coffee/Lye solution added to the oils; Mixture at trace consistency

The next step involves using a stick blender to stir the mixture until it reaches a thin pudding or gravy-like consistency (known as having ‘traced’).  When it’s ready, the drippings will leave a pattern on the surface if you lift the blender out of the mixture.  You could also use a whisk or a regular egg-beater, but thank goodness for technology as this would take ages!

Left to right: Soap poured into muffin tray; Finished soaps

I’ve been using a muffin tray as a soap mould as it’s easy to pop them out once they have set.  Soaps made using this method have to be left for two days, after which they should be ready for turning out of their moulds or cutting into blocks, etc.   The finished product should then be left to ‘cure’ for 3-4 weeks before use.

Hen Update

The four new pullets have settled in well.  We are thinking of opening the ‘door’ between the two parts of the run in about a week’s time.

Our red shavers are as mischievous as ever.  They will slip inside the back door if we leave it open, making straight for Molly’s cat-food or milk.  Once caught, they will meekly let us carry them back outside.  Lottie and Lulu are the most common culprits.

Actually, it can be very annoying.  Imagine a hot day with all the doors and windows open – I’ll be working away at some project and will hear the ‘tap, tap, tap’ of beak on plate, and will have to stop what I’m doing to chase the little biddy out.

Ben & Lottie
Ben & Lottie

Caterpillars, Leaves and Seeds

Image

Today started out clear, sunny and calm, but it clouded over as the day progressed.  It’s clearer now, but there is a storm traveling up from the South Island, and although it’s unlikely to travel this far north, we have been experiencing very strong South-Westerly winds, as can be seen by the cloud patterns to the west.

Our planned excursion to Helensville this morning was aborted half way there, as the road was closed due to a truck having rolled on one of the corners.  Rather than wait around for an hour or more for the tow truck to arrive and sort things out, we decided to head back home.

I spent some time this afternoon cutting back the ratty leaves on my tomatoes.  I spotted a couple of cabbage looper caterpillars, Trichoplusia ni, and picked them off.  I’ve posted images of these on the Nature Watch NZ site.  I love this site as it’s helped me to identify many of the unfamiliar bugs and plants I’ve come across since we’ve lived at South Head.

But I digress.  Last summer these caterpillars wrought havoc on my tomatoes – not only did they eat the leaves, which isn’t too much of a problem in itself, but they also like to tunnel into the actual tomatoes and many were spoiled.  From what I’ve read, I suspect that my tomato plants are becoming vulnerable due to there not having been any rainfall since Christmas.  It’s supposed to rain tomorrow, but if not, we’ll have to give our garden a decent watering.

Our hens like to eat the caterpillars, so it is with some satisfaction that I feed them any that I find.

Garlic

Image

The photo above shows how little garlic we have left!  But the garlic we harvested around this time in 2013 has lasted all year so we haven’t had to purchase any.

Image

Our garlic plants aren’t looking that amazing …  again, the soil has become very dry.  We did dig in a decent amount of compost during the year, but with our light soil, it just seems to become absorbed really quickly.  And of course, I’ve been lazy about weeding. The garlic bulbs will be ready to lift and dry when the foliage dries off and turns brown.

Leaf Mulch

The tawny leaves that can be seen lying on the the soil amongst the plants are from the huge Lilly Pilly trees that line our back fence.  There doesn’t seem to be one time of the year that they don’t shed their leaves.  At first this used to drive me mad, but I’m accustomed to them now.  Every so often I make the effort to sweep them all up and add them to our compost heap.

Image

We’d also started a bag of leaves for leaf mulch – but I must admit that although I started out really keen to keep the leaves separate, I lost interest within a few days of starting the bag.

Image

Lemon Grass

Another garden task we tackled today was the removal of an overgrown lemon grass plant.  I must admit that when we purchased it as a precious, tiny plant three years ago, I thought that a spot in the vegetable garden would be just fine, but it’s grown out of proportion to what I’d expected.  And I worry when it’s seeding (as it has been for the last several weeks).

I use lemon grass from time to time when marinating prawns or cooking up something Asian, but I don’t tend to use it often enough to allow it free reign in my garden.

Image

So, Ben had the task of digging up this unfortunate plant and we’ll buy a new one at some point and decide on a more appropriate place somewhere else on the property.

Seed-Sowing

Other than that, I’ve had a pretty lazy day.  Ben had pulled out a row of bolting celery a couple of days ago, so we’ve sowed the following seeds in the space freed up by its removal: –

Carrot ‘Touchon’ (Daucus carota var sativa) , Mesclun Lettuce Mix (Lactuca sativa), Radish ‘Easter Egg’ (Raphanus sativus), Pea ‘Easy Peasy’ (Pisum sativum) and Organic Rocket (Eruca sativa).

For those not familiar with botanical names, you’ll notice the use of the word ‘sativa’ or versions of this in the names of all the seeds.  Sativum, Sativus, and Sativa are Latin botanical adjectives meaning ‘cultivated’, applied to certain seed-grown domestic crops.

Rum, plums, corn and squash

ImageRum Pots and Cherries

What a hot day it’s been!  One of my plans for today was to find a use for the remaining plums along with some of the strawberries, now that latter are ripening up nicely.

I had been reading about rum pots, also known as rumtopf and romkrukke.  This seemed like a really cool way to preserve some of our fruits as they come to fruition on our trees.  I’ve mostly missed the boat re the plums, but starting now, I should be able to use our strawberries, pears, tamarillo and feijoa.  I also collected a few Cape gooseberries, as these grow like weeds around our property.

Image

The ideal container for a rum pot is a ceramic container or a dark jar, as the fruit should be protected from bright light.  I was also looking for something that would hold a decent amount of fruit.  In the end, the best containers I could find were some tall, glass spaghetti jars, enclosed in a metal sleeve, with a wee window on one side.  Into these I layered the fruit with 1/2 their weight in white sugar, then topped them up with dark rum until the fruit was just covered.

Sad Cherry Tale

Some years ago, my daughter Amiria had brought me back a small bucket of export quality lapin cherries from Summerfruit Orchards in Central Otago, where she had been employed fruit-picking.  I saved a few of the finest specimens, added them to a sturdy glass jar and covered them with brandy.  I kept this jar of cherries for 3 to 4 months, having placed it in a shady place at the corner of my kitchen bench – I’d rotate the jar regularly to keep the alcohol circulated through the fruit.

Ben was washing dishes one day and thought the jar of cherries something old to be discarded, so he tipped them into my compost bucket.  I didn’t notice that they were missing until it was too late.  I’m sure I’d have scooped them out of the compost bucket if I’d known straight away!

I still wonder about those cherries – what they would have tasted like…  But it’s a lesson on letting people know about the strange concoctions we have in our kitchens.

Asparagus

Image

It’s time to allow our asparagus plants to produce their ferny foliage so that they can grow strong and healthy for our Spring 2014 crop.  These plants have been in place for 4 years now, and this year we were eating spears continually from the end of September through to the end of December.  We had put in some plants of the regular green variety as well as having sown seeds of the purple, Asparagus Sweet Purple.

Freshly-picked asparagus, lightly steamed and served with melted butter is one of the special flavours of a spring garden.

Sweet Corn

Image

It’s been a busy time for Ben, collecting as much sweet corn as he can, before he runs out of energy.  Over the past 2 days, he’s harvested around 150 ears and has spent a good proportion of the day scraping off the kernels and freezing them free-flow for winter use.  It’s a time-consuming task and not much fun when it’s so hot outside, but well worth it.  He’s also frozen some of our runner beans.

I mixed up a batch of corn fritters for lunch – couldn’t resist it!  They were yummy!

Other Garden Tasks

Image

Other garden tasks undertaken today included cutting back the spent sweet peas from the back fence of our main vegetable garden.

Image

Around February last year I collected seeds from a patch of sweet peas I had sown the previous Winter.   We sowed these this year to see how they would turn out.  The blooms haven’t been as strong, nor as fragrant, and are in a very narrow range of colours: scarlet, vermillion and shades of pink, none of them particularly vivid.

This was disappointing on a couple of levels as (1) I’m not a pink or a red kind of a girl, and (2) I prefer my flowers to have a fragrance.

gardenia

The same can’t be said for our gardenia which has been flowering very well this year compared with last year.  We saved this shrub from our previous property in Titirangi, where it struggled with the paucity of sunlight.  I do love the beautiful waxy flowers with their creamy, honeysuckle fragrance.

bougainvillea

Another plant currently providing brilliant colour to the garden is the bougainvillea, Scarlet O’Hara.  This is another plant we saved from Titirangi.  There, it barely produced a single new shoot, and failed utterly to produce the beautiful crimson bracts.

Hibiscus Golden Oriel

We also recently planted a very garish looking hibiscus, Hibiscus Golden Oriel, a Hawaiian hybrid.  I couldn’t resist it, but usually don’t like flowers that combine the colour yellow with red!

Other tasks for today have involved checking on how the vegetables are progressing.  I have a habit of walking around my garden at least once a day, but often go back again in the late afternoon, mainly to check on what needs pruning or cutting back, or which vegetables are ready for harvest, which need to be pulled out, etc.  To be honest, there is not enough hours in the day, so I tend to just do the things that interest me at the time.

Buttercup & Butternut Squash

Today I was especially pleased with the progress of my squashes, Burgess Buttercup and Butternut Chieftain.  I’ve grown these two as I particularly like the taste of their flesh.  Also,  they are extremely prolific, which means we’ll be provided with many individual squashes of a perfect size for two people.

Thelma Saunders Sweet Potato

I’ve also grown a new pumpkin this year, Thelma Saunders Sweet Potato.  According to information I have read, this is the sweetest of the heirloom acorn squashes and is named after Thelma Sanders of Adair County, Missouri.  It is renowned for its cooking qualities and has won many a harvest bake-off competition in the USA.

It doesn’t seem to be producing as many pumpkins as I’d hoped, but there is still plenty of time until the end of the season.

I obtained seed for both the pumpkin and the squashes from Kings Seeds.

fruits

The passion fruit, macadamia nuts and pears are developing as expected.   I really need to somehow get to the top of the pear tree to thin the pears… ideally there should only be 2 – 3 fruit per bunch to allow them to grow properly.

The passion fruit are very fat and healthy looking, and the macadamia nuts look to be producing a good crop this year.

let_tom

The tomatoes are fine, although they seem to be a bit slower to ripen than at the same time  last year.  I have grown several varieties from seed: Mortgage Lifter, Cherokee Purple, Bloody Butcher, Black from Tula, Black Krim and Sun Cherry.  I especially like the ‘black’ tomatoes, but am always interested in trying new varieties.

The lettuces are bolting and I’ll have to compost them soon.  The basil is slow to grow, too.  I’m thinking this is to do with the lack of rain prior to Christmas, but they should put on good growth now that the weather has settled.

sunset

When the sun set today, we had generated a very respectable 14.59 KWh.  Not bad for our 11 panel / 2 KW system.  There is something so very satisfying about generating our own power from the sun.  I’ll never take this for granted!

Corn Relish

Image

Ingredients

Method

Finely chop the oregano and the coriander, (until the moisture in the leaves is starting to ooze out).  Neatly dice the capsicum and chop the onion finely.

ImageImage

Toast the ground cumin in a medium saucepan for 1 – 2 minutes (until aromatic).  Add the onion, vinegar, sugar, oregano, habanero and salt, and bring to boiling point.  Simmer for about 5 minutes. Add the capsicum and corn, and simmer for a further 3 – 4 minutes, or until the corn is cooked through.

Pour into hot sterilised jars and preserve using the water bath method.

ImageAdapted from the recipe for ‘Cilantro Corn Relish’ from About.Com Home Cooking.

http://homecooking.about.com/od/condimentrecipes/r/blcon92.htm